How to Cut and Edit the Video Made by a Dashboard Camera
Dashboard cameras have become unbelievably popular – they are set in almost every car these days, and some friends of mine even have set two dashboard cameras in their car: one for the front view, and the other for the rear sight. There are thousands of videos uploaded on YouTube made using these cameras. Which video editing software should be used to edit the videos made by a dashboard camera? There are two possible options here.
Online Video Editor on YouTube
If you need only basic features, like say, to cut out the right part from the video, you could use the video editor available on YouTube (UPDATE, You cannot! Google discontinued YouTube Video Editor). To do that, you need to upload the whole video on YouTube and use an option available on it to crop it. To do all that with ease, you need a high-speed Internet connection.
Video Editor for a Dashboard Camera
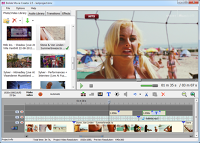
For those seeking extended editing features, I recommend you use a special video editing software. For say, the Bolide Movie Creator support the majority of video formats. Other than that, this software has additional features that will help you make your video attractive.
It is really easy to start working with this software. Download and install it like any other program. Start the program and drag and drop the videos of your choice onto the main window. You’ll see them when you click on "Photo/Video library" tab in the left-hand column of the software. From there you can easily add them to the timeline. You can now crop the added video by several mouse clicks and can add some text to the video using the T-button. You can also adjust the brightness and contrast for your video, which is very useful for the videos made in bad weather conditions or poor lighting.
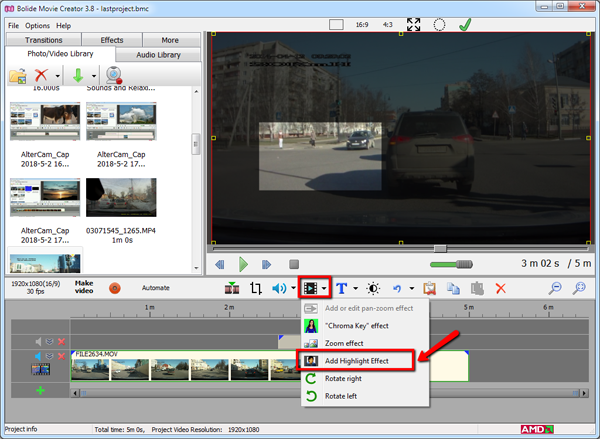
If there is something in your video that you would like everyone to notice but there is a big chance that it will be overlooked at the first site, I recommend you to try the unique feature for this on Bolide video editing software. You press the square button and select "Add Highlight effect". Set the selection rectangle in the right place in the video. The size of the selection rectangle can be changed with a mouse click. The screenshot shows how it works (the button to activate this feature is shown with a red arrow):
It goes without saying that you can turn down the volume of your video (in case you said something inappropriate) or you can entirely muffle the sound. You can also add background music to your video. Just drag and drop the right file into the program window, and then to the free track in the project.
Uploading the Video to YouTube
You can upload the video on YouTube once your video file is ready. The steps are simple - all you need to do is log in to your account and click on the Upload button.
Attention! Some good advice! YouTube often asks you to stabilize the video made by a dashboard camera as YouTube doesn't like shaky videos. So, I urge you not to agree to this offer to stabilize the video. It's a fact that the video will become smoother after stabilization but at the same time the borders will get cut and something very important can be withdrawn from the video, moving look unnatural.
You now have all the knowledge on how to edit videos from a dashboard cam and how to successfully upload them to YouTube. Go ahead! :)
Latest Version

(for Windows 11/10/8/7)
User review
"I’m getting used to it, there are a lot of convenient functions, I searched for a long time and chose the right program :-) I’m glad I found it."
Zea Mendoza - Rating: 4.5 -

