Change Video Transparency
Transparencies are helpful when you want to have more than one visual element appear on the screen at the same time. Also known as superimposing, creating transparencies can add a classy effect to your movie making projects. In fact, many effects like fade out/in are technically a form of transparency because they involve taking one or more clips and setting the opacity to less than 100%. You can also apply transparency to a single image or clip to reduce its opacity.
-
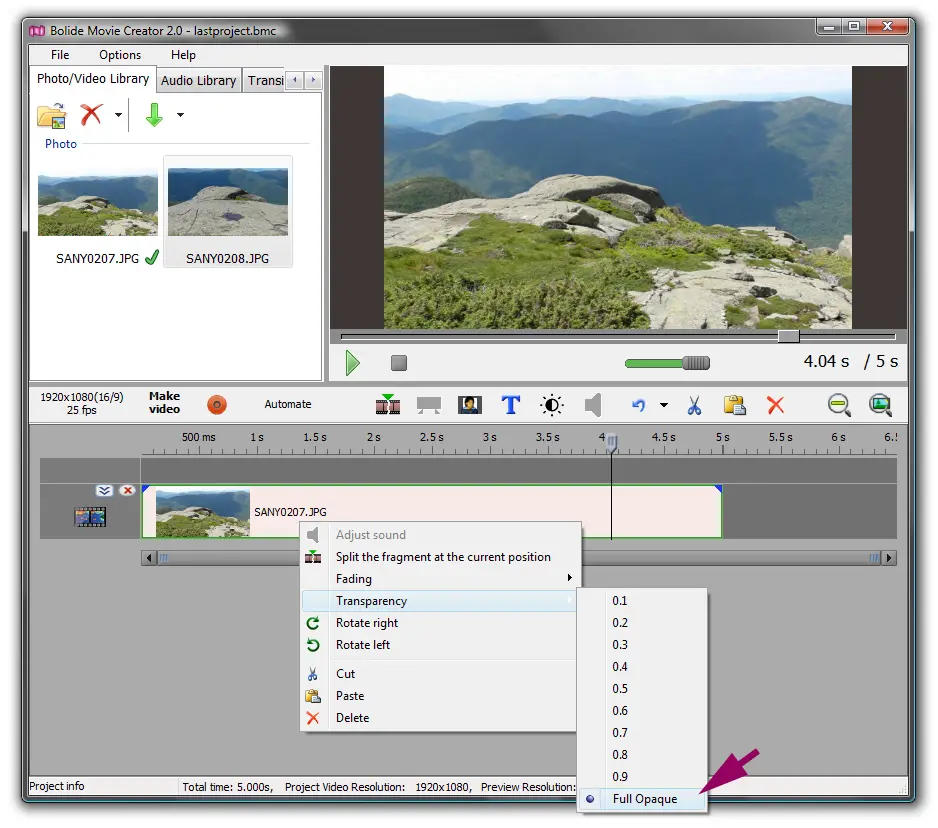
To adjust clip opacity (and increase transparency) simply right-click the clip and select Transparency from the menu. Notice how it is set to Full Opaque by default? That means the clip is 100% solid in its original visual state.

-
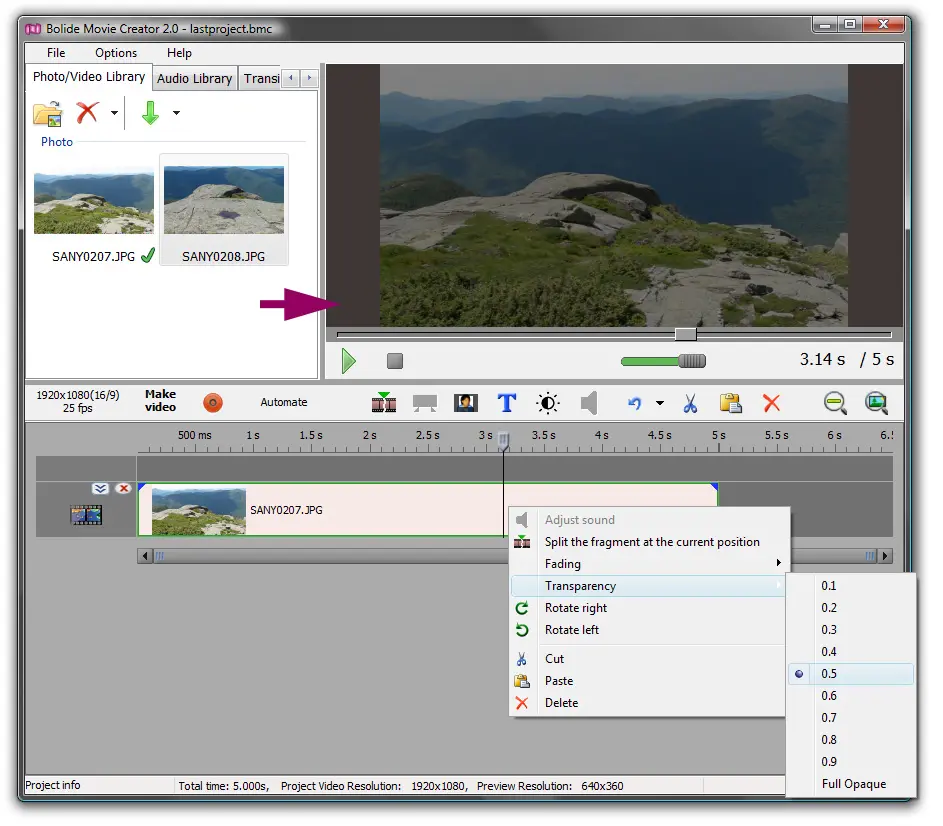
By clicking 0.5 for example, you can change the clip opacity to 50%, or only half-solid. Notice the difference between the two thumbnails? The second image is now 50% see-through.

-
To superimpose two visual elements using a transparency and see them both at the same time, you'll need to adjust the transparency on at least one of the clips. Experiment with this feature by stacking two clips on the same timeline, but using different tracks. Note: when you stack media elements on your timeline, the top-most track will be visually dominant; meaning without a transparency, it will completely overwrite the image below it so completely that you won't even be able to see it.

- For this example, let's overlap two tracks and add a 50% transparency to the image on top. See how the image changes allowing you to see both overlapped in the preview window?
Back to Video Editing Guide.

