Add Transitions and Effects
As you begin to create more advanced movies by adding multiple clips together, you'll want to consider adding transitions and effects to help smooth over the edges where your clips meet. In the Transitions tab, you'll find many professional grade transition options. In the Effects tab, you'll discover preloaded Virtual Screen graphics with an option to create a new template from an image.
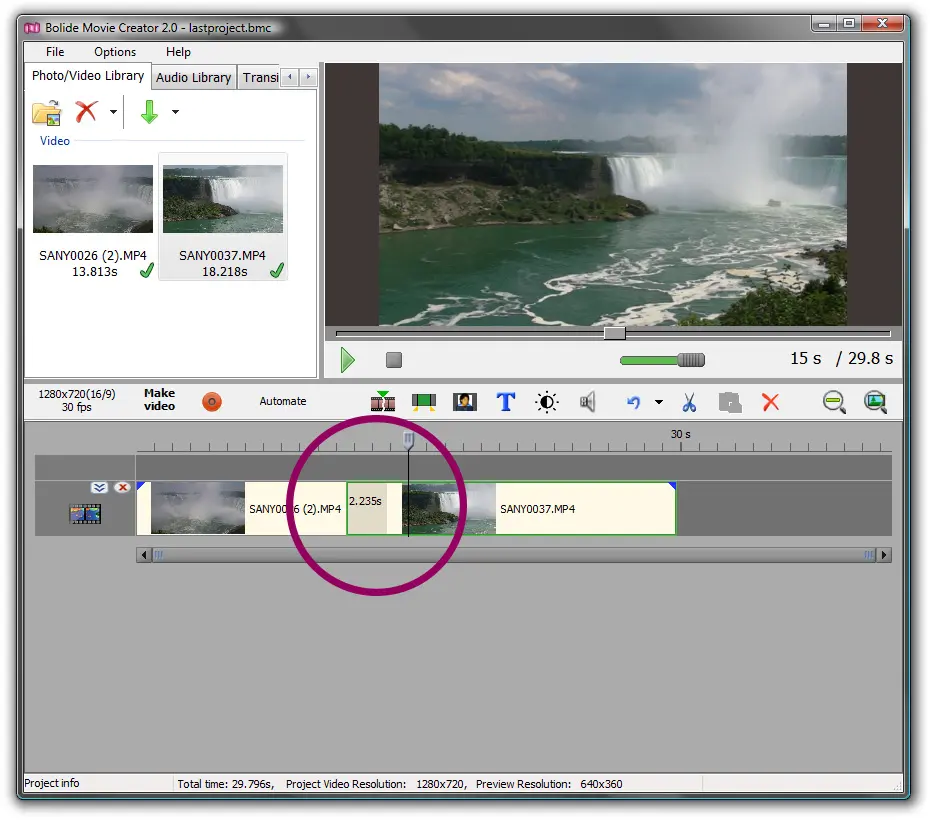
- To add a transition to your video, you'll need to have at least two video clips on your timeline. You can add clips to your timeline using the green Add arrow, or by dragging and dropping them there with your mouse. Note: there is no limit to the number of tracks you can add to your project timeline.
-
Next, position the video clips so that the end of your first clip slightly overlaps the beginning of your second track. Once the two clips are overlapped, you'll notice a highlighted area between them; this is where your transition will be added.

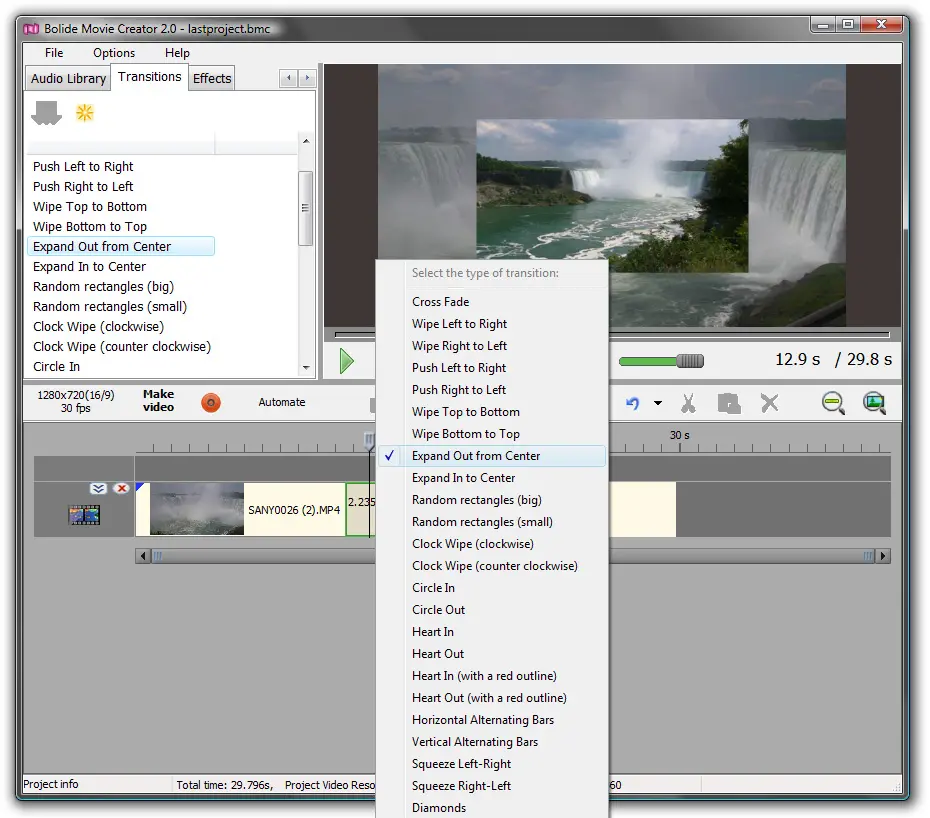
- Next, with the two clips overlapped, choose which Transition or Effect you want to apply to it.
-
Right-click the highlighted overlapping area to choose from a menu of available transitions (you can also access a list of transitions by clicking on the Transitions tab above the media library).

- The Automate button lets you set overlap and fading by using predefined times. Choose from various durations ranging from 0.5 to 2.0 seconds. This feature lets you accurately and automatically apply uniform fades to all overlapping clips in a track.
Back to Video Editing Guide.

