Add Fading for Video Clips
If you've ever attended a play, or taken in a film at an old-style movie theater chances are good that you already know about fading. Just like the curtain that opens and closes on stage; marking the beginning and end of each new act... fading in a video editor works the same way. Fades let you create transitions at the beginning & end of a movie and in between clips. Only with a video editor, there's no curtain. Instead, it's replaced by a gradual fading from nothing into something, and then back to nothing again.
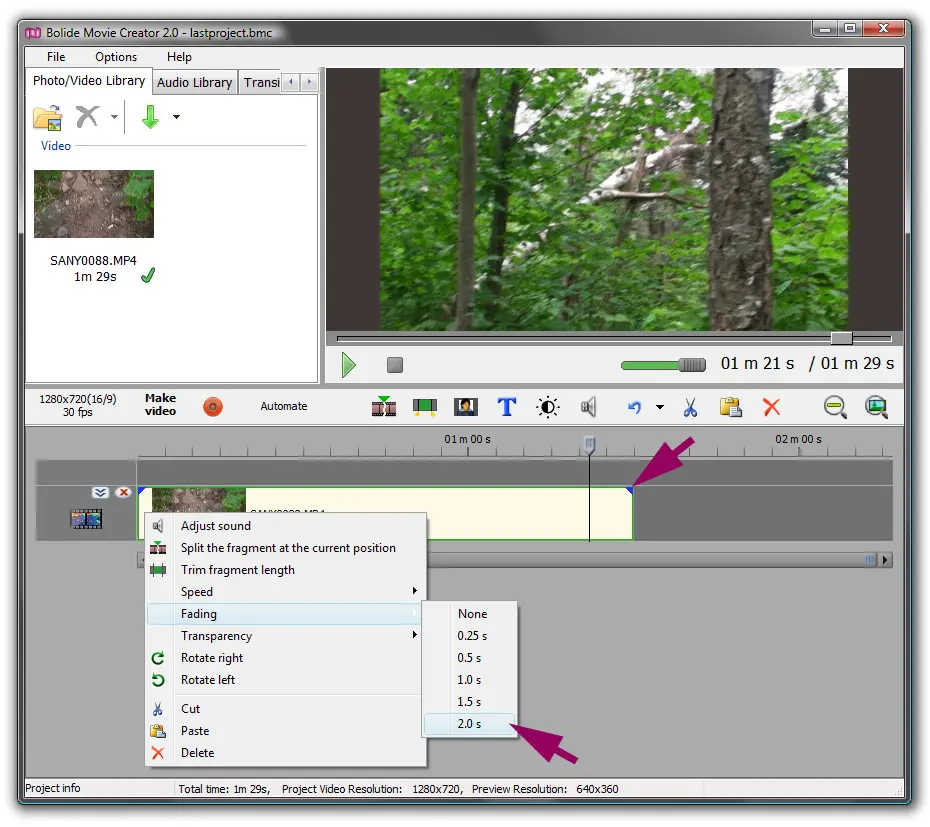
- To add a fade to your video clip, hover your cursor over the blue triangle located at the corner of the clip until the cursor changes to the <||> icon and reads Fade In (beginning of the clip) or Fade Out (end of the clip).
-
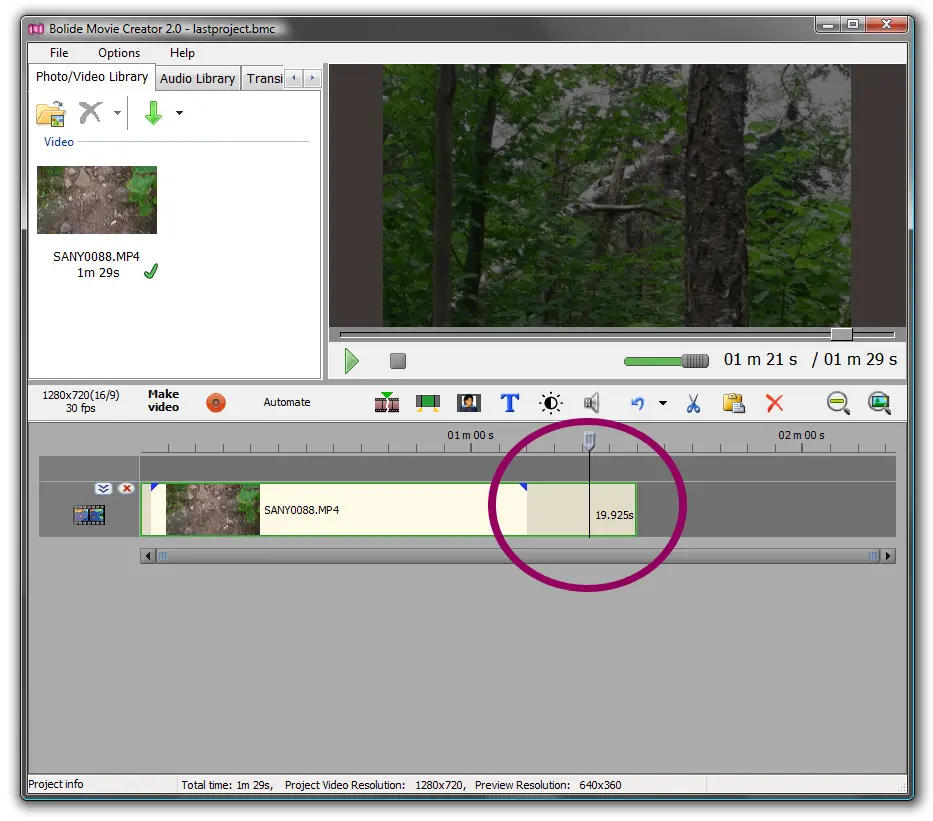
Next, drag the blue triangle toward the center of the clip to highlight and set an area that will be affected by the Fade. Note: you can also right-click the clip and select Fading from the menu to apply a pre-defined fade length from 0.25 to 2.0 seconds.


- Notice how the image changes (darkens) when fade out is applied? Like a curtain closing on the clip, a fade effect will slowly fade out and darken (or fade in and lighten) the ends of your clips.
- The Automate button lets you set fading for all clips in a given track using predefined times. Choose from various durations ranging from 0.5 to 2.0 seconds.
Back to Video Editing Guide.

